Copyright: © 2024 by the authors. Licensee: Pirogov University.
This article is an open access article distributed under the terms and conditions of the Creative Commons Attribution license (CC BY).

ORIGINAL RESEARCH

Intraocular lens stitching to iris with full preservation of its functions: microreconstructive techniques

About authors

Pirogov Russian National Research Medical University, Moscow, Russia

Correspondence should be addressed: Khristo Periklovich Takhchidi
Volokolamskoe shosse, 30, korp. 2, Moscow, 123182, Russia; moc.liamg@1031tph

About paper

Compliance with ethical standards: the study was approved (Minutes #239 of April 15, 2024), and the patients voluntarily consented to surgical treatment and processing of personal data.
Received: 2024-10-14 Accepted: 2024-11-15 Published online: 2024-12-18
|
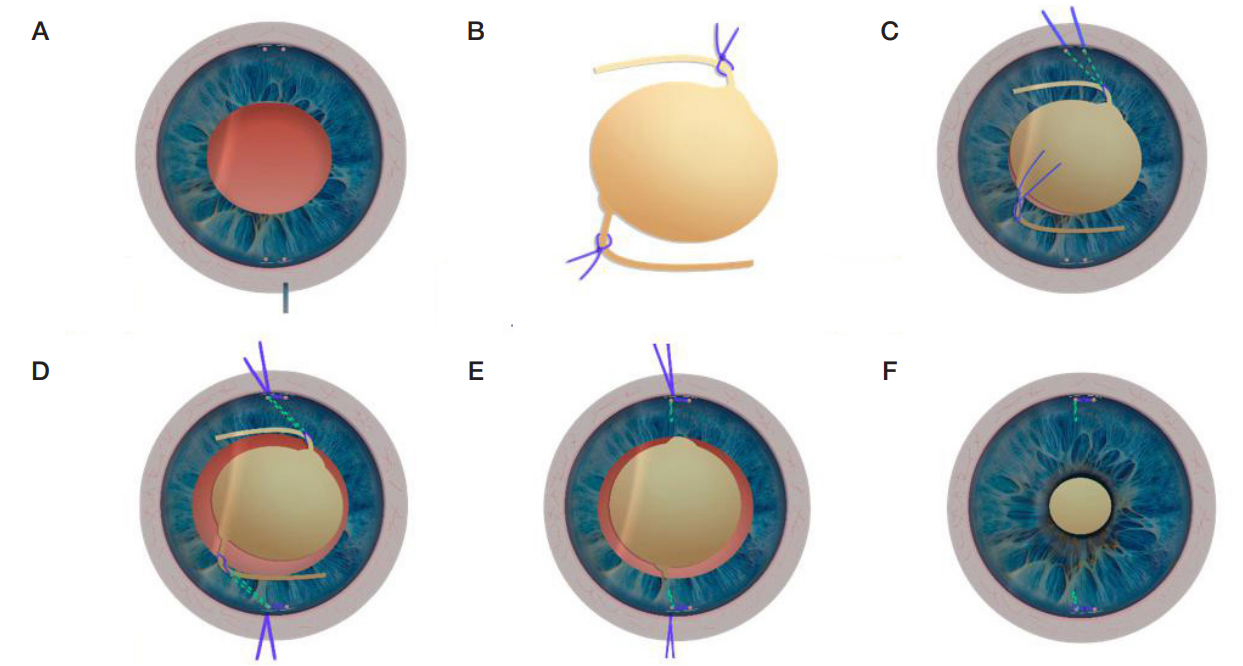
Fig. 1. IOL repositioning and stitching to the iris in cases involving dislocation of the IOL–capsular bag complex. A. Suture made on the top haptic element (blue line), needle with a thread passed through the corneal edge of the limb, root of the iris (dotted line shows the position of the needle behind the iris and the haptic element), and brought out; paracentesis made 2–3 mm from the needle injection point, microcoloboma made in the iris root in the projection of the paracentesis (highlighted pink). B. Output end of the thread brought out by a microhook through microcoloboma and paracentesis. C. The input second end of the thread is pulled through the same paracentesis. D. The IOL–capsular bag complex is pulled to the point when the base of the opposite haptic element appears. E. Similar manipulations performed on the opposite haptic element. F. The threads are pulled out, tied, and cut off, the incisions hydrated.
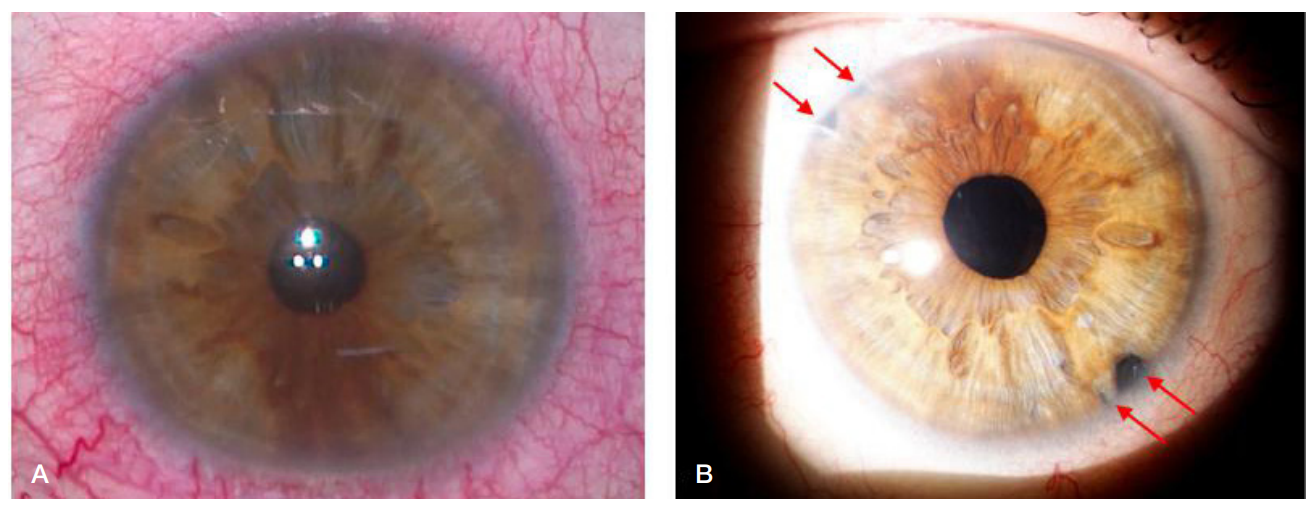
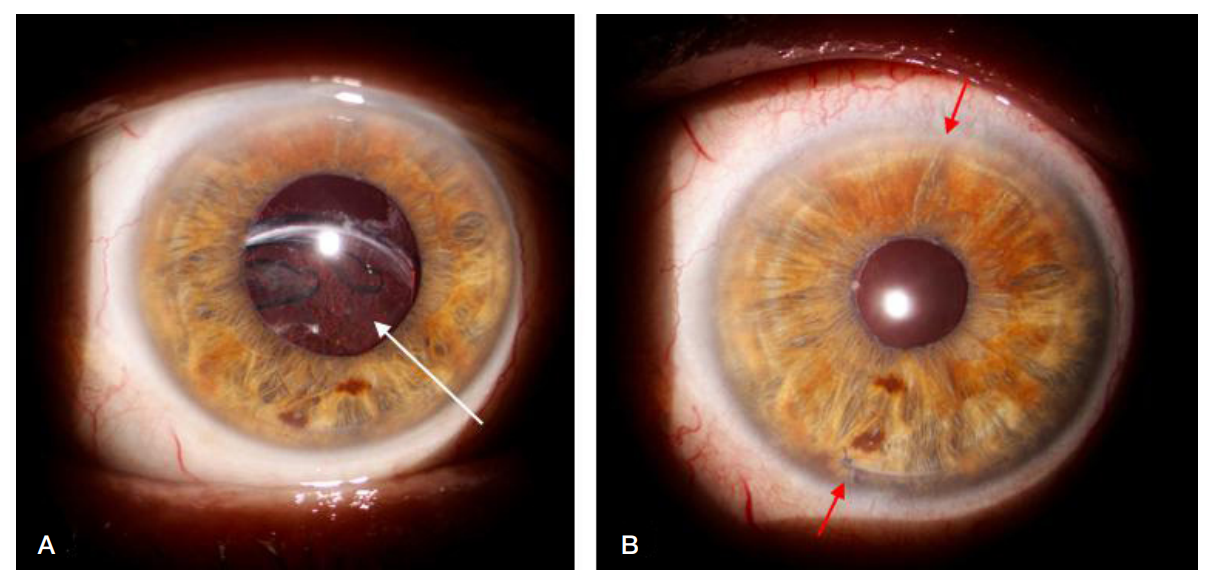
Fig. 2. Anterior segment of the eye with dislocated IOL–capsular bag complex. A. Before surgical treatment (drug-induced mydriasis): dislocation of the IOL (white arrow). B. After surgical treatment: round pupil, active reaction to light, solid fixing suture knots, IOL fixed and centered as expected from the suggested technique; red arrows point to the zones of suture knots and microcolobomas
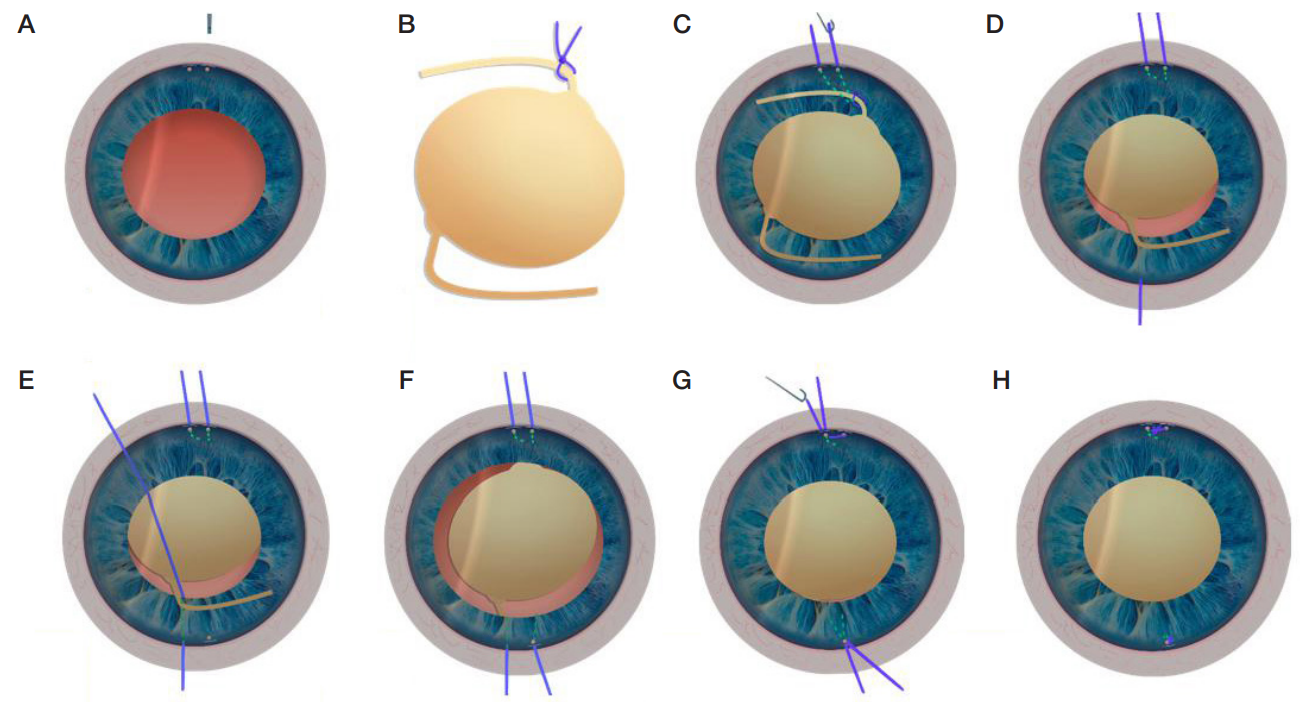
Fig. 3. IOL implantation in the absence of capsular support. A. Two paracenteses (temporal and nasal) made in the limb, 2–3 mm from each other, with similar paracenteses made at the opposite ends of the same meridians in symmetrical positions; next, microcolobomas made in the projection of each paracentesis (highlighted pink). B. Top and bottom haptic elements with fixing threads (blue color) tied to them, outside the eye. C. IOL with sutures implanted into the anterior chamber, the ends of the thread fixing top haptic element pulled through the respective microcoloboma and paracentesis (temporal and nasal). D. Similar manipulations done on the bottom haptic element (opposite): with the help of a microhook, both ends of the fixing threads pulled through the upper and lower temporal paracenteses. E. The IOL is positioned behind the iris, the ends of the fixing threads are pulled and knotted. F. The ends of the threads are cut off, viscoelastic washed, incisions hydrated
Fig. 4. Anterior segment of the eye with lacking capsular support. A. Before surgery. B. After surgery: round pupil, active reaction to light, solid fixing suture knots, IOL fixed and centered as expected from the suggested technique; red arrows point to the zones of suture knots and microcolobomas
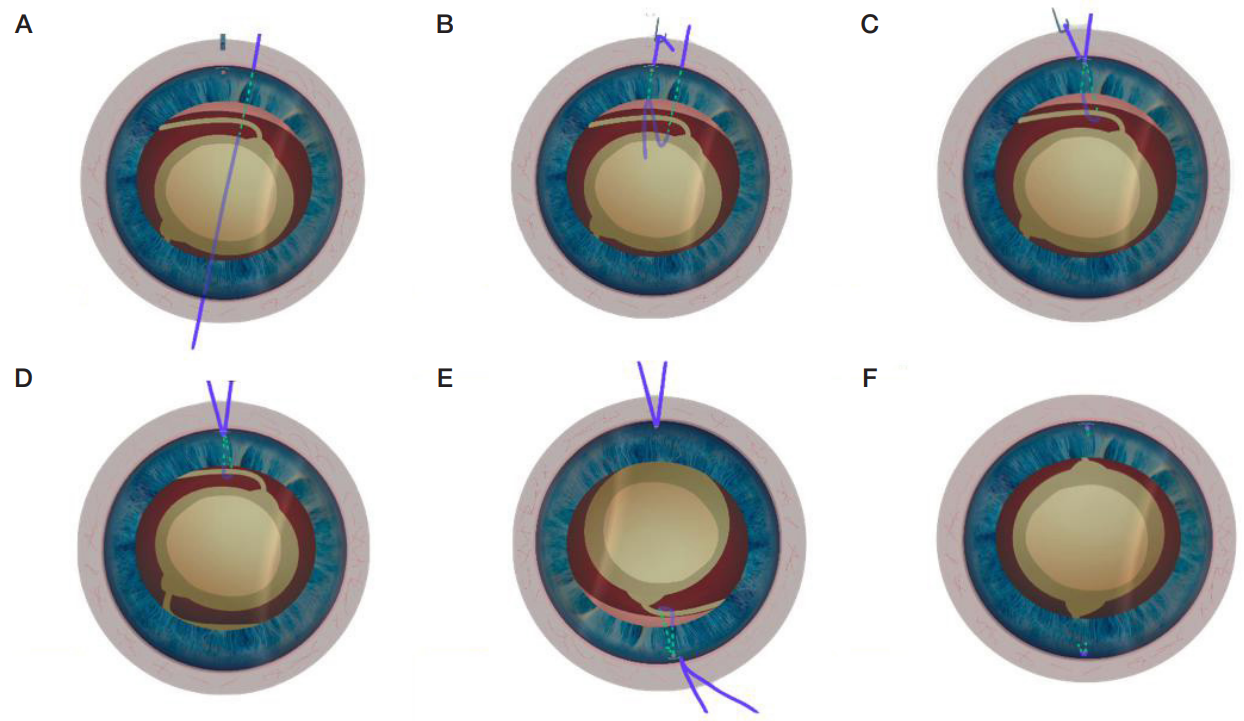
Fig. 5. IOL implantation and attachment to the iris against the background of weak capsular support (diagram). A. Two paracenteses (temporal and nasal) made in the limb, 2–3 mm from each other, then microcolobomas made in the projection of each paracentesis (highlighted pink). B. Outside the eye, the fixing thread is tied to the top haptic element (highlighted blue). C. The IOL with a suture is implanted into the anterior chamber, inner and outer ends of the thread fixing the lens to the top haptic element pulled out with a microhook through the respective microcoloboma and paracentesis. D. Top haptic element positioned behind the iris; the IOL is pulled up by the ends of the threads until the base of the bottom haptic element appears. E. Suture made on the bottom haptic element (blue line), needle with a thread passed through the corneal edge of the limb, root of the iris (dotted line shows the position of the needle behind the iris and the haptic element), and brought out; paracentesis made 2–3 mm from the needle injection point, microcoloboma made in the iris root in the projection of the paracentesis (highlighted pink). F. Bottom haptic element positioned, output end of the thread pulled out through the microcoloboma and the paracentesis with a microhook. G. Both input second ends of the threads pulled to the paracentesis and knotted. H. The ends of the threads are cut off, viscoelastic washed, incisions hydrated